> ## Documentation Index
> Fetch the complete documentation index at: https://valmiio.mintlify.site/llms.txt
> Use this file to discover all available pages before exploring further.
# Configure Outcomes and Cost Allocation
> Set up action tagging, cost allocation, and outcome definitions for your agents
## Configure Outcomes and Cost Allocation
This guide shows you how to configure your metering setup so the platform can properly track costs and identify outcomes. You'll set up action tagging, assign costs to actions, and define which actions represent business outcomes.
## Step 1: Go to Metering
Navigate to **Metering** in the left sidebar. This is where you configure all your metering settings. You'll see four tabs: Live Data, Action Tagging, Cost Allocation, and Outcome Definitions. We'll work through the last three tabs to set everything up.
## Step 2: Assign Auto Tags to Actions
In the **Action Tagging** tab, you'll see a list of all the actions your agent is performing. These come from two sources: auto tags that the SDK automatically creates, and trace events from your LLM calls.
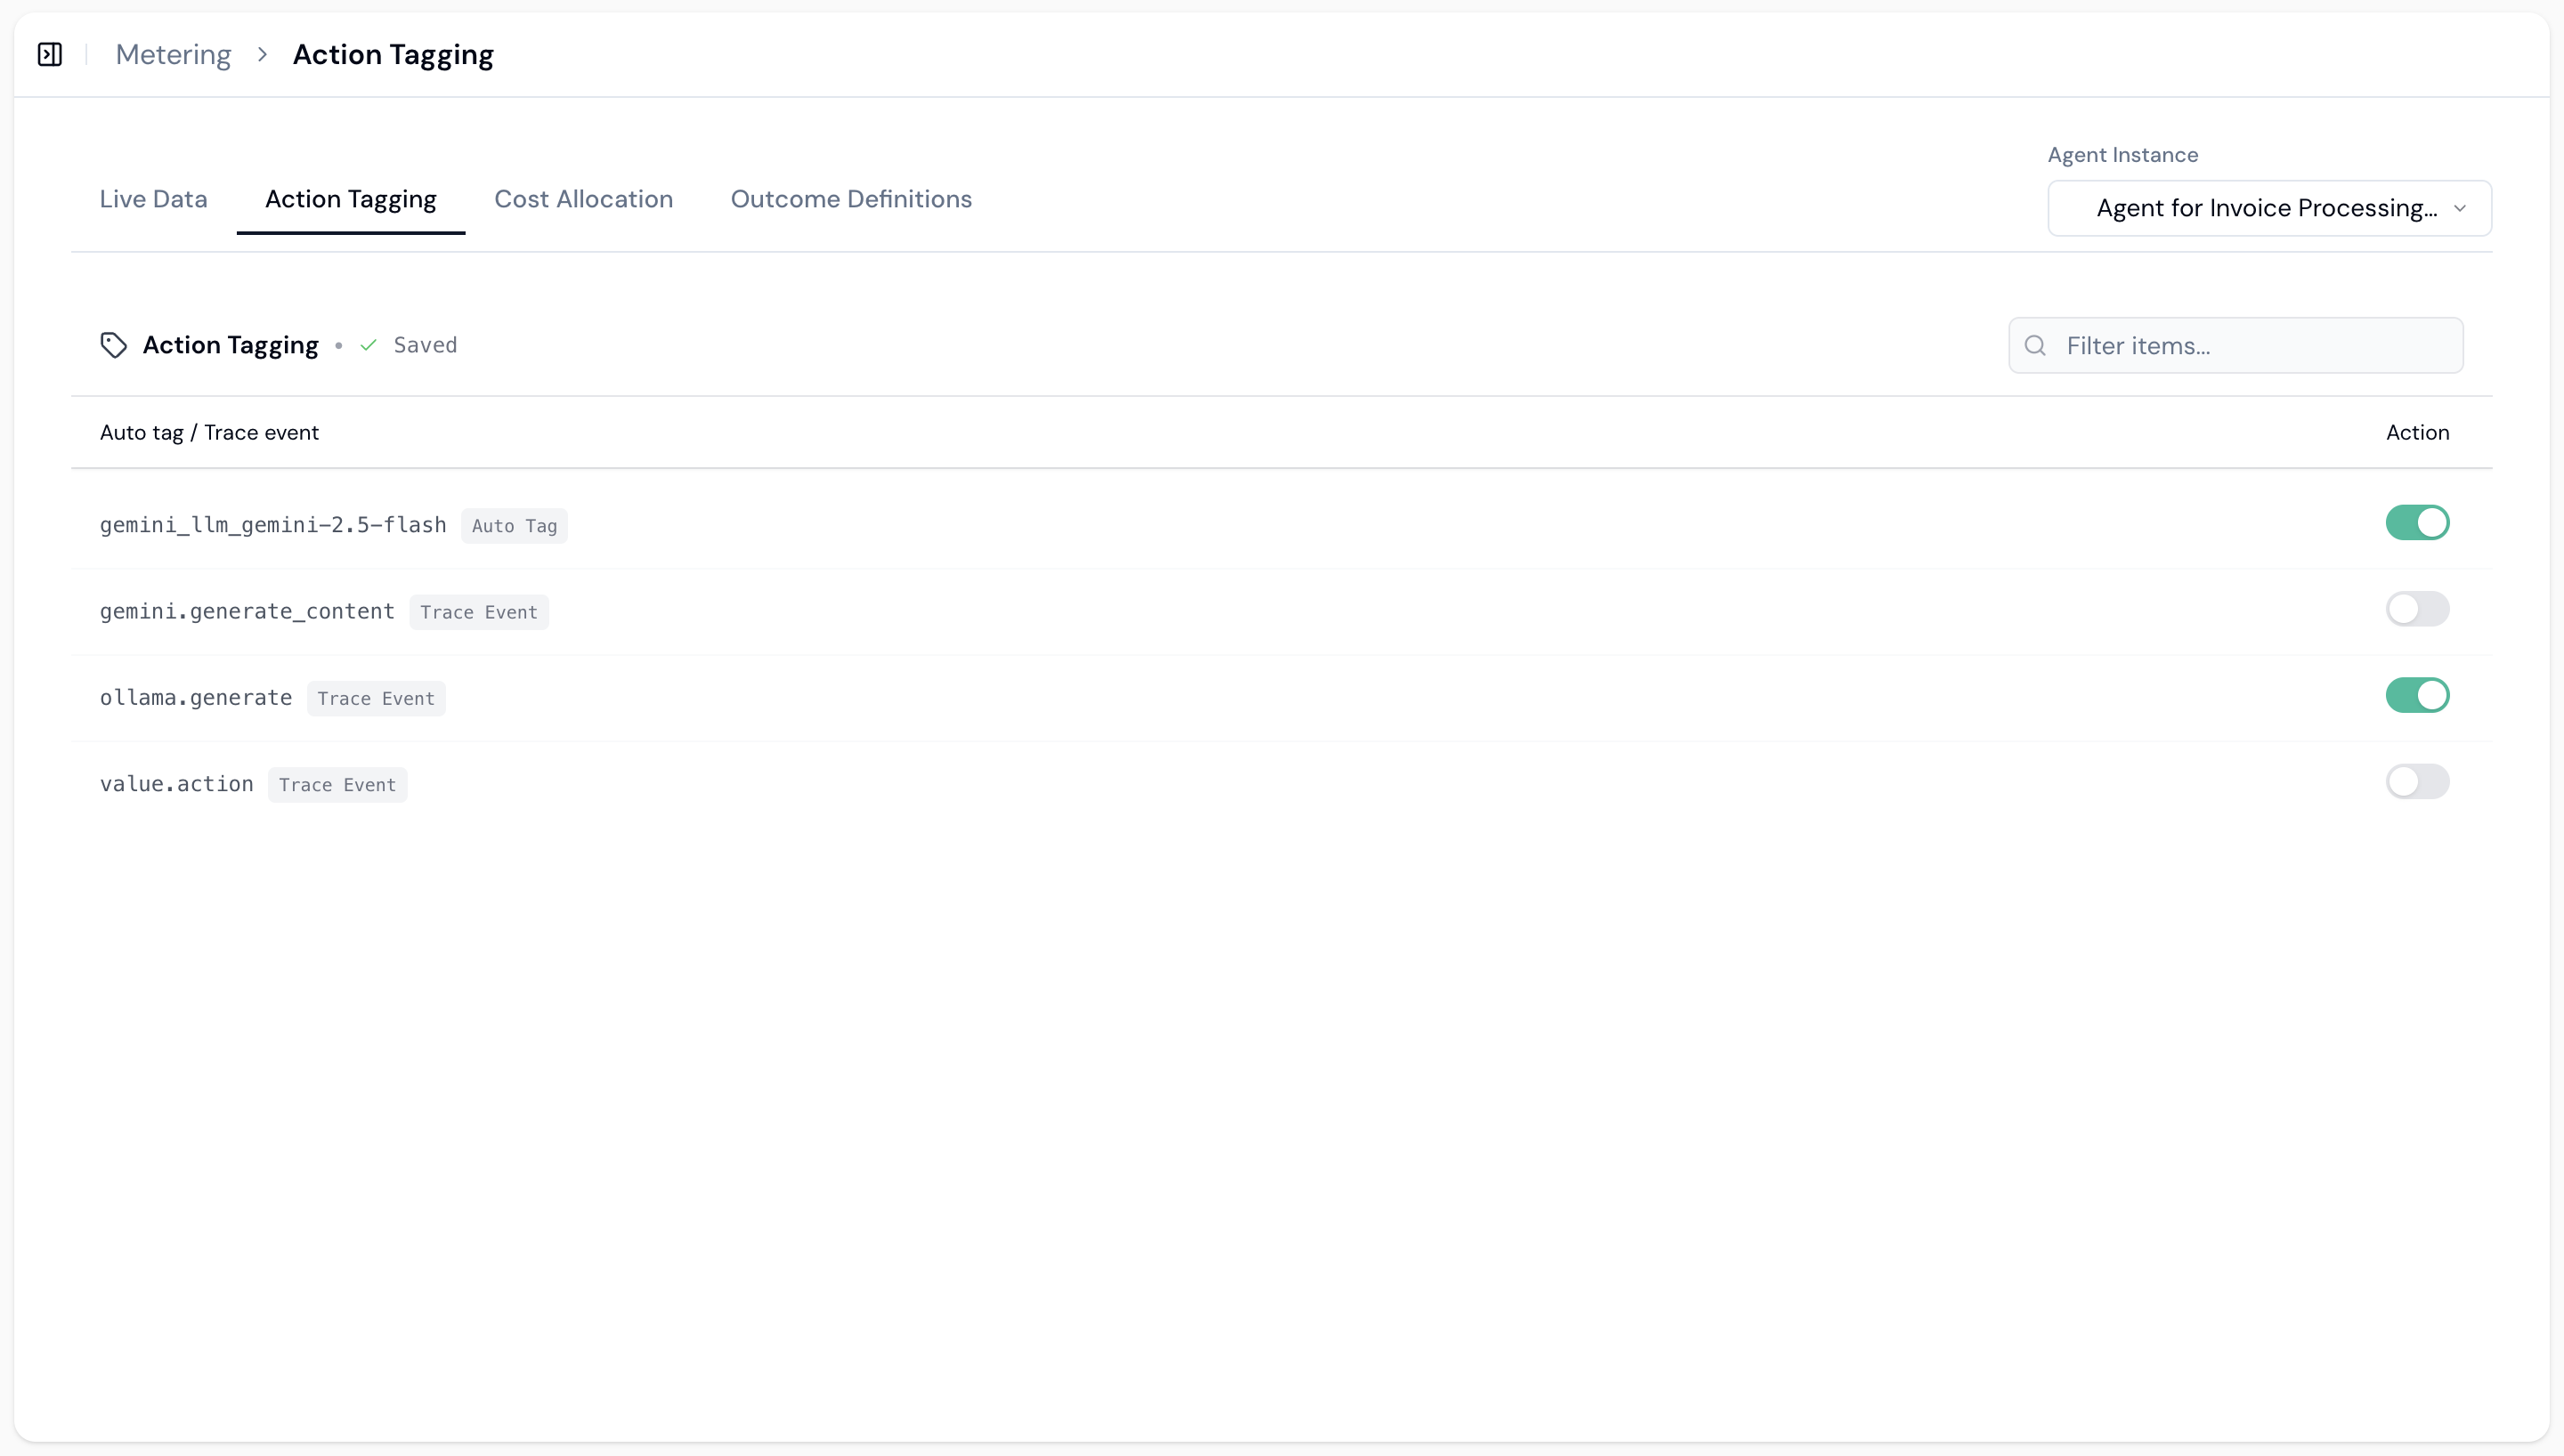 Each action has a toggle switch. Turn on the toggles for the actions you want to track. For example, you might enable `gemini_llm_gemini-2.5-flash` to track Gemini LLM calls, or `gemini.generate_content` to track content generation. The actions you enable here will be available for cost allocation and outcome definitions.
When you're done, you'll see a green checkmark with "Saved" indicating your changes are saved.
## Step 3: Assign Cost Allocation
In the **Cost Allocation** tab, you assign costs to each action. This tells the platform how much each action costs you, which is essential for profitability analysis.
Each action has a toggle switch. Turn on the toggles for the actions you want to track. For example, you might enable `gemini_llm_gemini-2.5-flash` to track Gemini LLM calls, or `gemini.generate_content` to track content generation. The actions you enable here will be available for cost allocation and outcome definitions.
When you're done, you'll see a green checkmark with "Saved" indicating your changes are saved.
## Step 3: Assign Cost Allocation
In the **Cost Allocation** tab, you assign costs to each action. This tells the platform how much each action costs you, which is essential for profitability analysis.
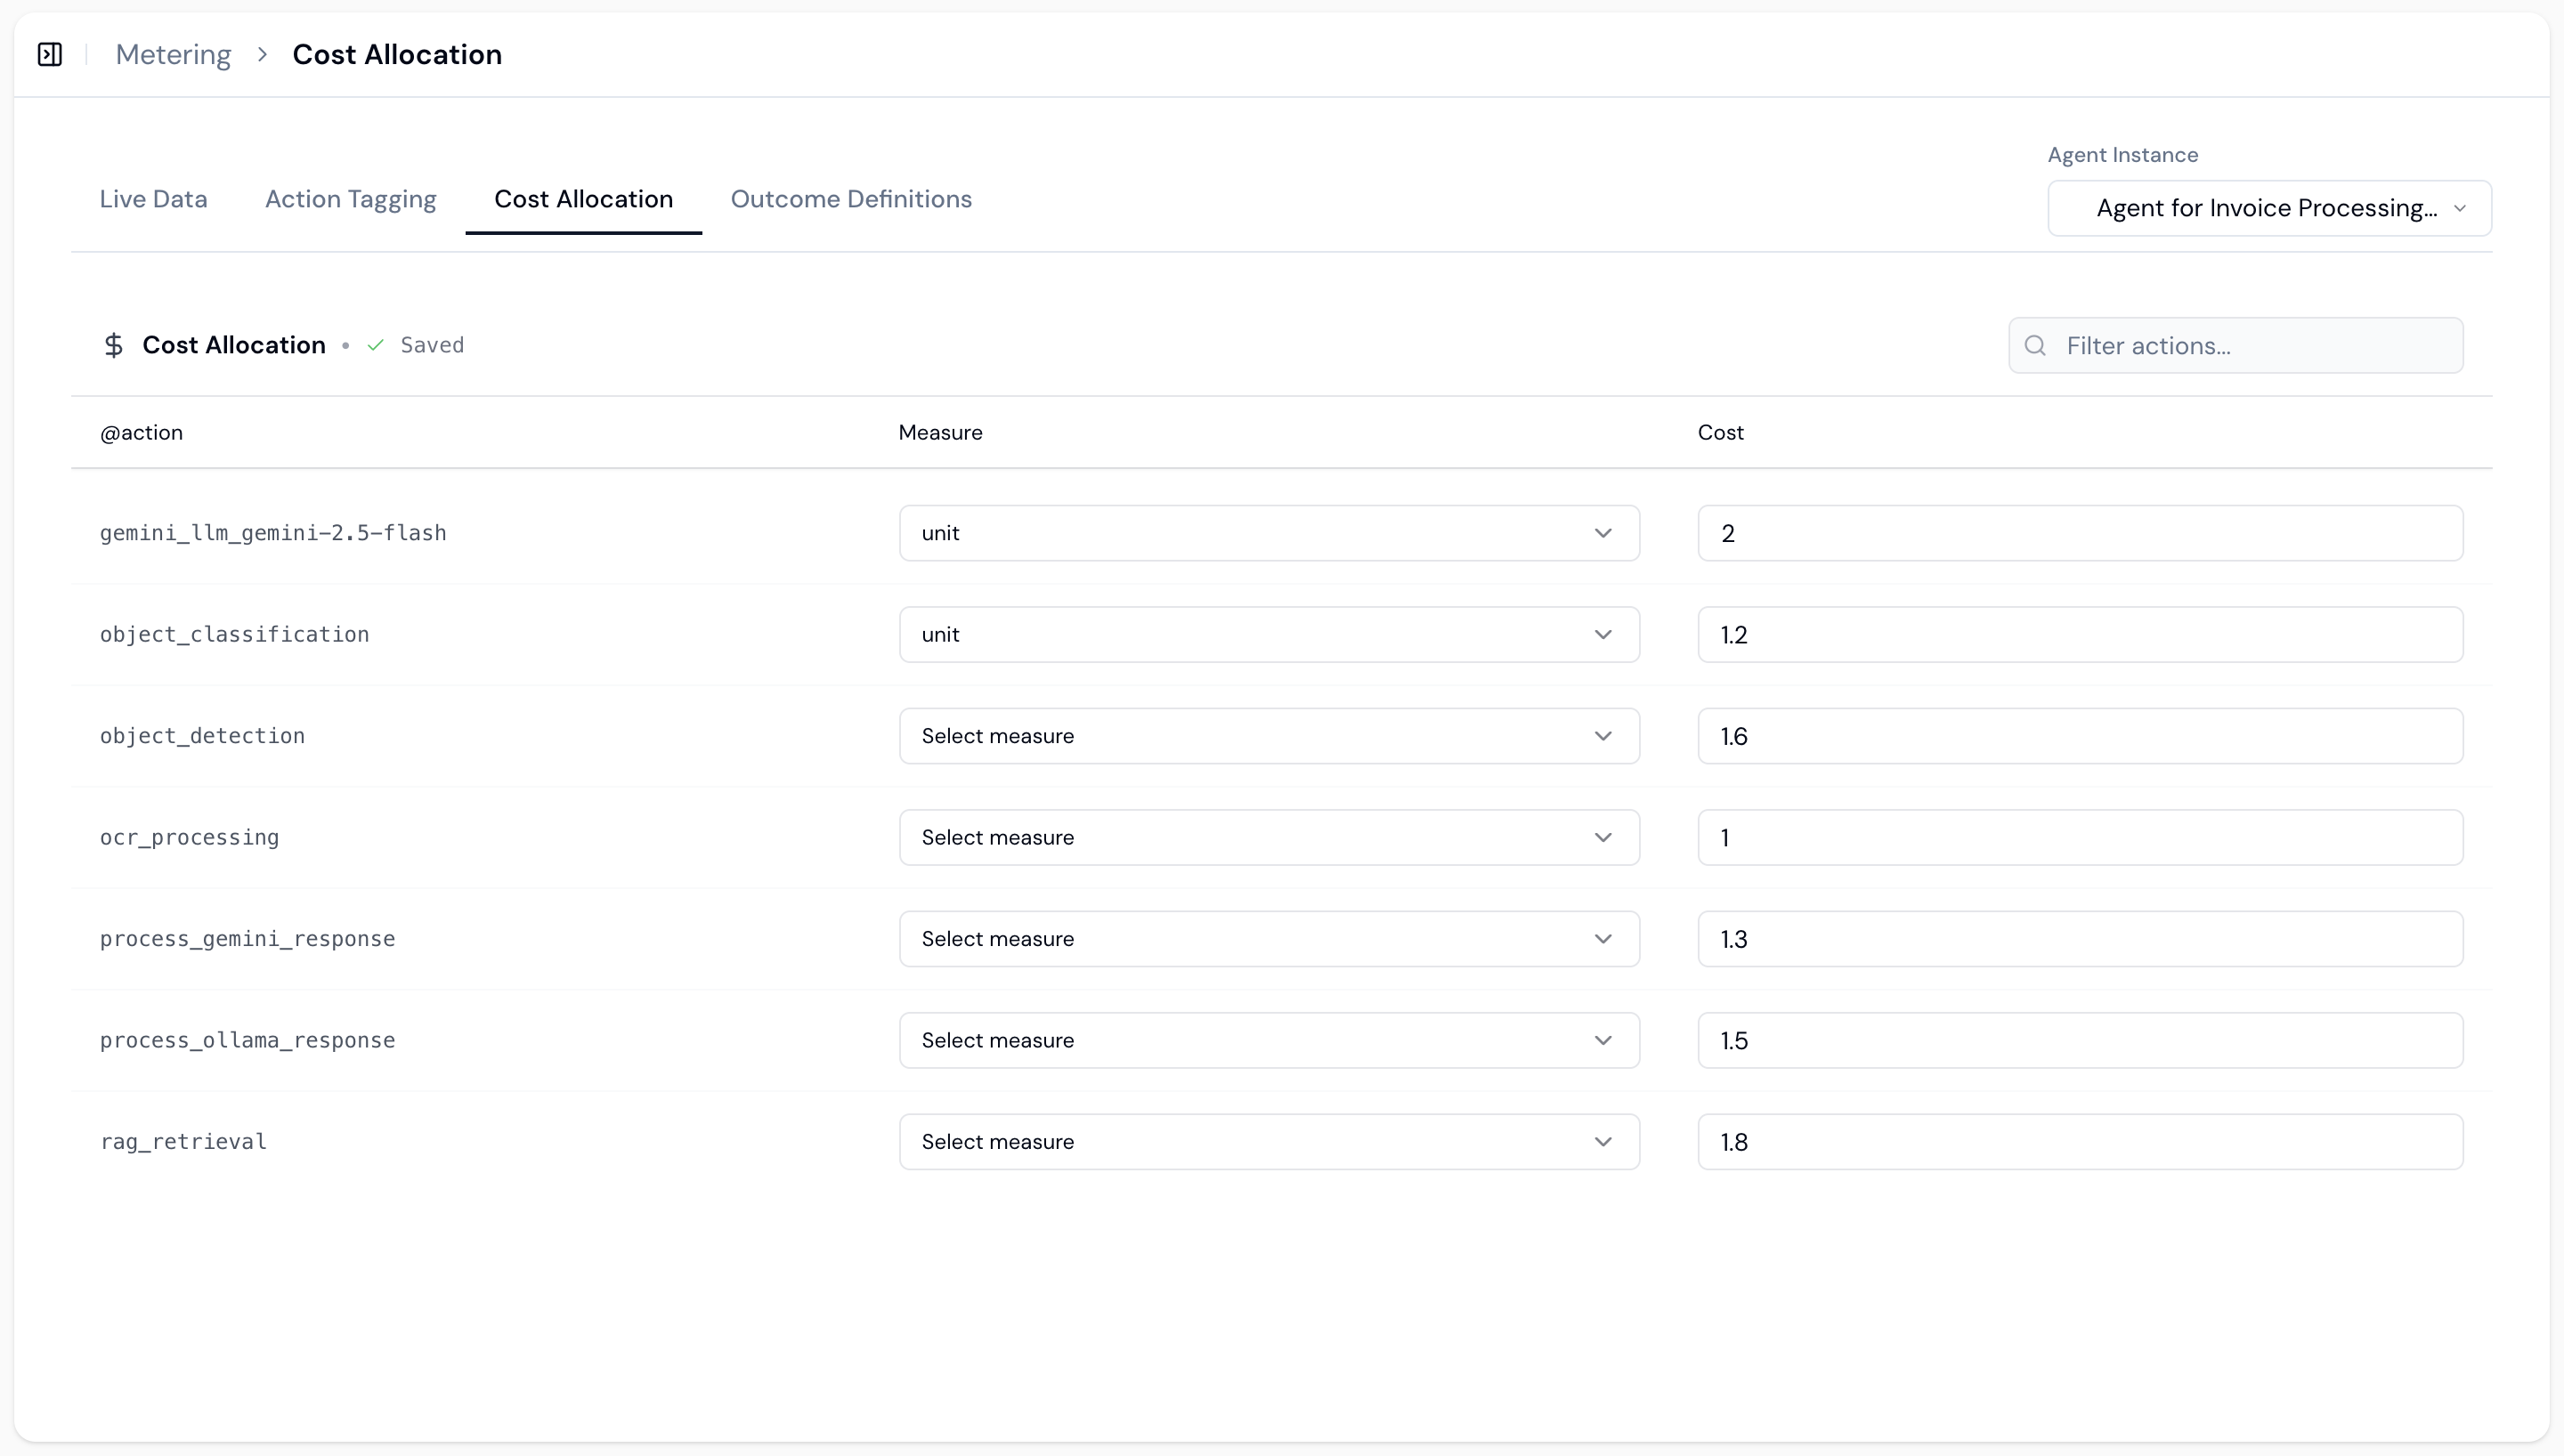 For each action, you select a measure and set a cost. The measure can be `token` for LLM calls, `unit` for other actions, or other units of measure. Then you enter the cost per unit. For example, `gemini_llm_gemini-2.5-flash` might use `token` as the measure with a cost of `0.006` per token. An `object_classification` action might use `unit` as the measure with a cost of `0.003` per unit.
The platform uses these costs to calculate your expenses and show you profitability. When you're done, you'll see a green checkmark with "Saved".
## Step 4: Assign Outcomes
In the **Outcome Definitions** tab, you define which actions represent business outcomes. Outcomes are the business results you care about, like successful hires, converted leads, or completed tasks.
For each action, you select a measure and set a cost. The measure can be `token` for LLM calls, `unit` for other actions, or other units of measure. Then you enter the cost per unit. For example, `gemini_llm_gemini-2.5-flash` might use `token` as the measure with a cost of `0.006` per token. An `object_classification` action might use `unit` as the measure with a cost of `0.003` per unit.
The platform uses these costs to calculate your expenses and show you profitability. When you're done, you'll see a green checkmark with "Saved".
## Step 4: Assign Outcomes
In the **Outcome Definitions** tab, you define which actions represent business outcomes. Outcomes are the business results you care about, like successful hires, converted leads, or completed tasks.
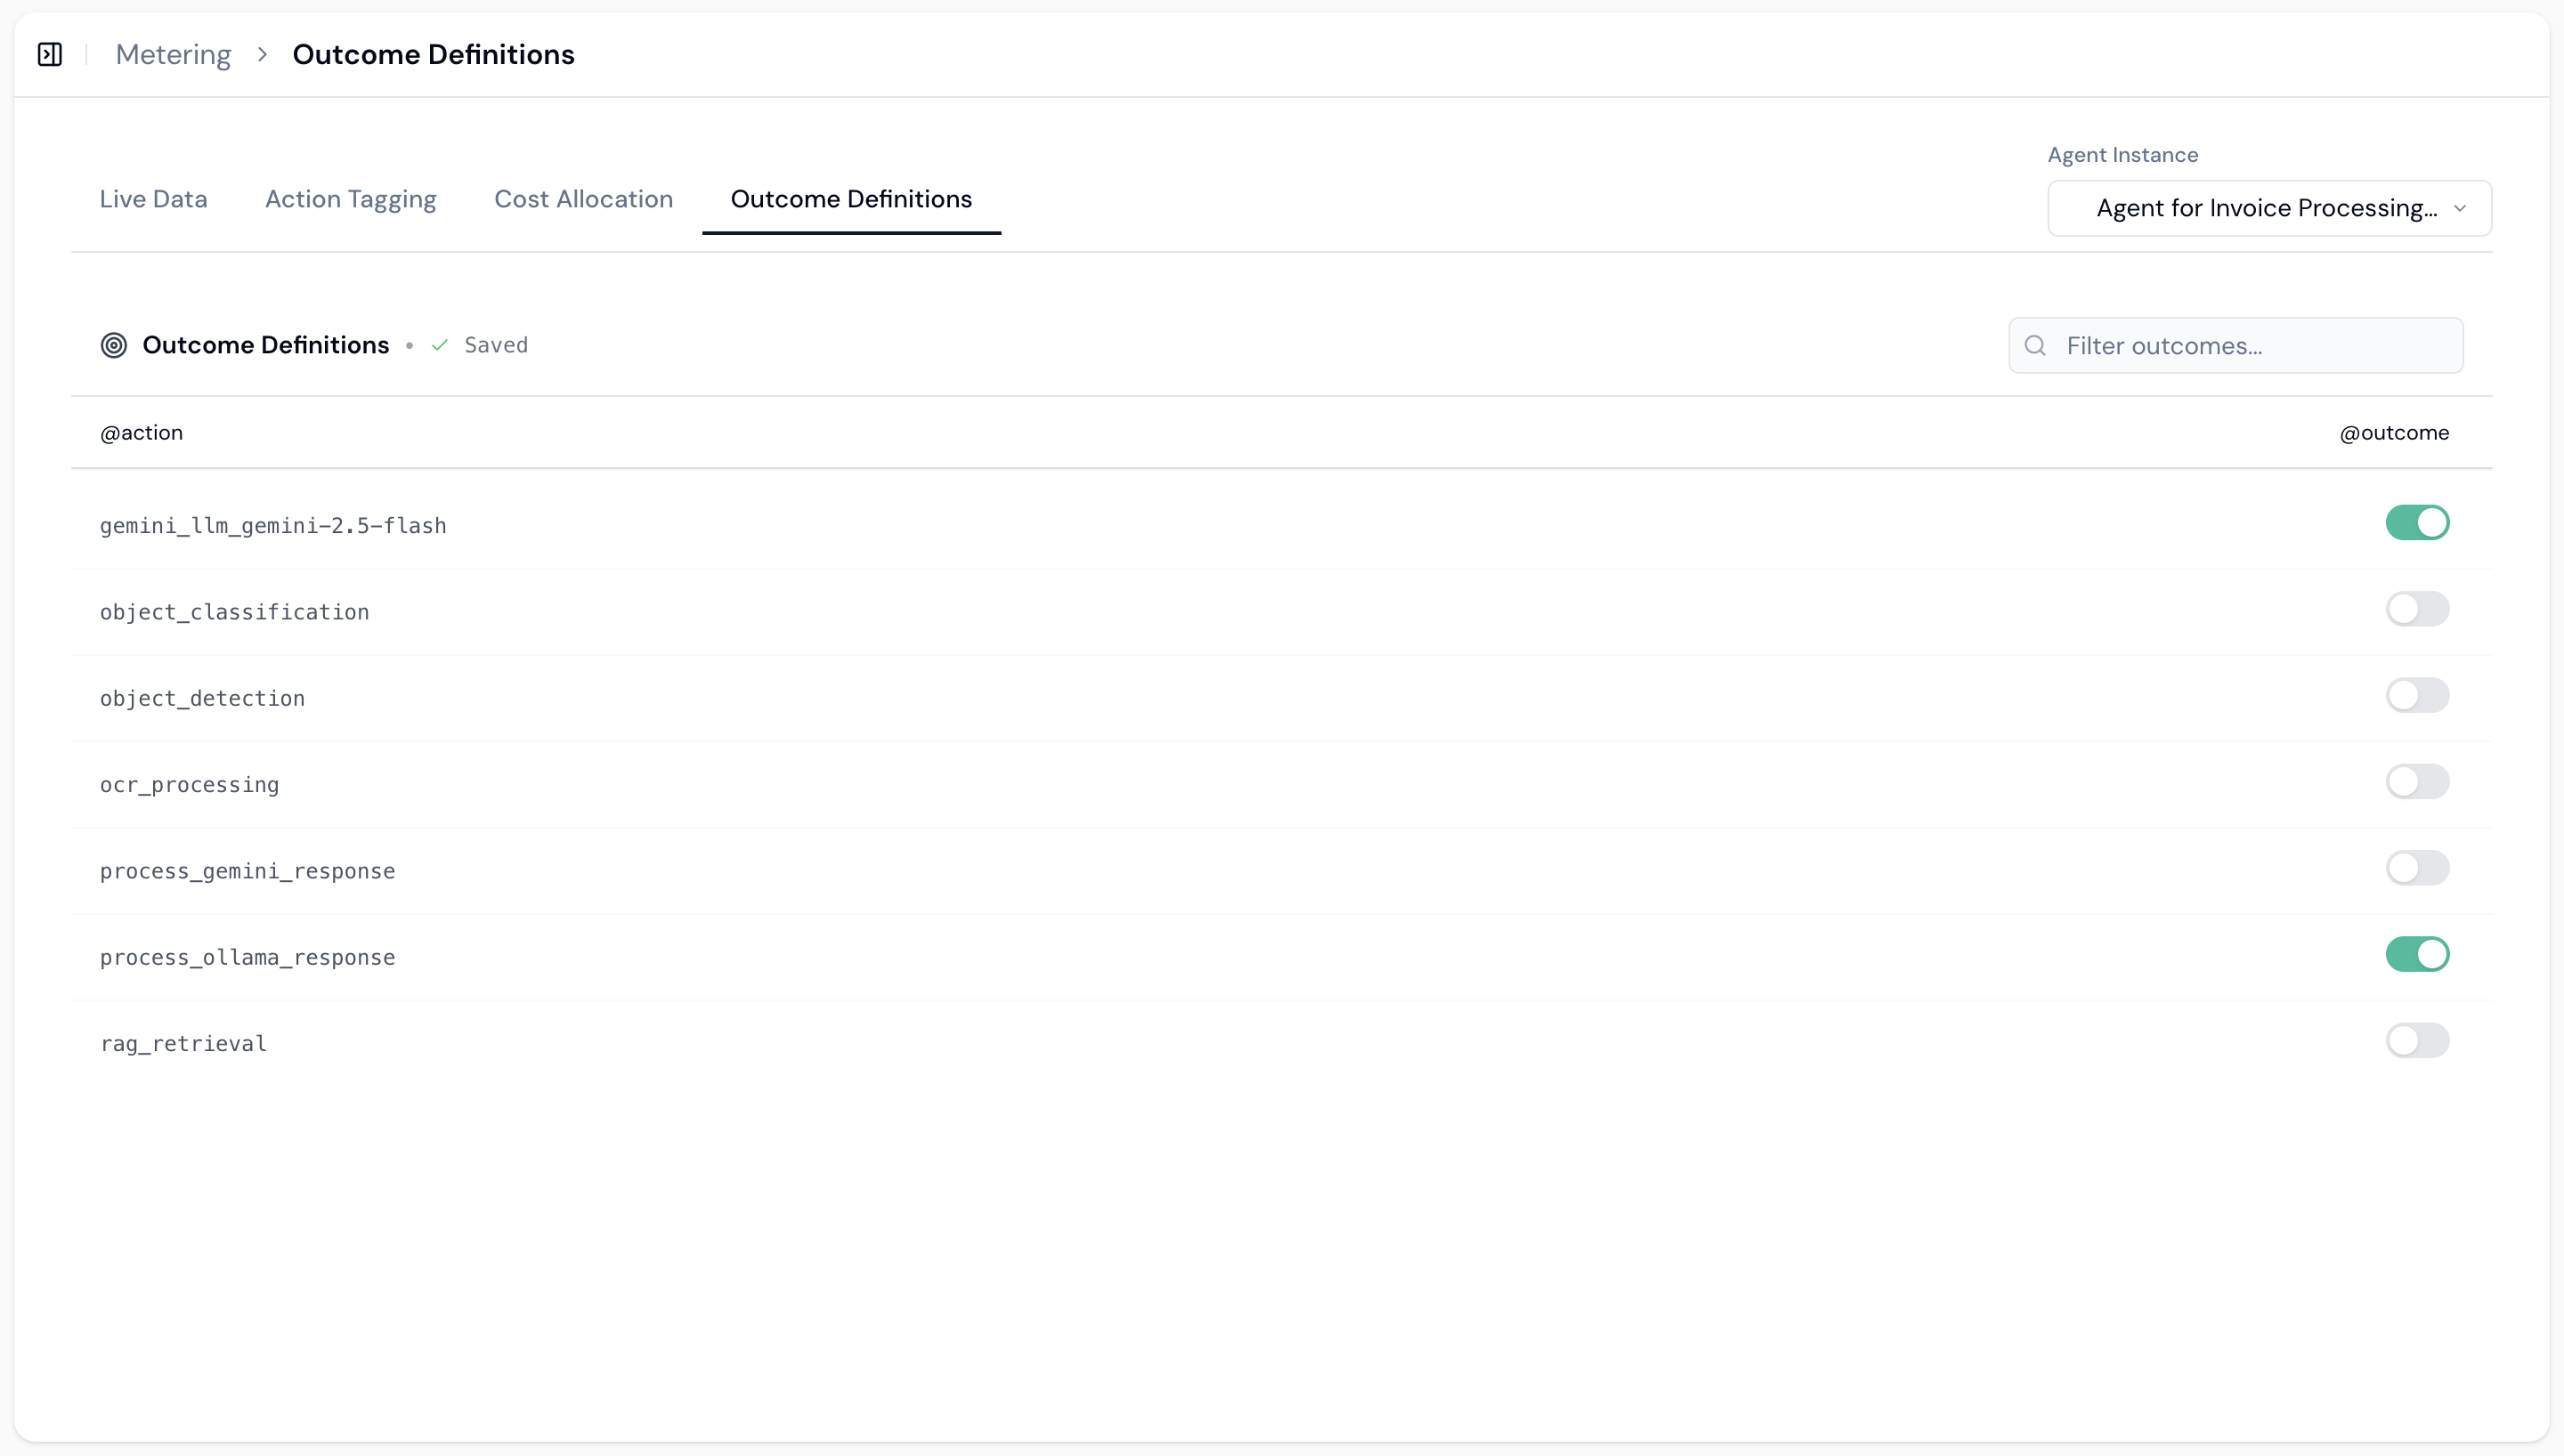 You'll see a list of all your actions. Toggle on the actions that represent outcomes. For example, if `object_detection` represents a successful outcome in your workflow, turn on its toggle. The platform will then track these as `@outcome` in addition to `@action`, which allows you to price based on outcomes.
When you're done configuring, you'll see a green checkmark with "Saved". Your metering is now fully configured. The platform will track costs for all your actions and identify outcomes automatically.
You'll see a list of all your actions. Toggle on the actions that represent outcomes. For example, if `object_detection` represents a successful outcome in your workflow, turn on its toggle. The platform will then track these as `@outcome` in addition to `@action`, which allows you to price based on outcomes.
When you're done configuring, you'll see a green checkmark with "Saved". Your metering is now fully configured. The platform will track costs for all your actions and identify outcomes automatically.