Setup Outcome-Based Billing
This guide walks you through setting up outcome-based billing from scratch. You’ll create a product, add a rate plan, and configure charges that bill customers based on@outcome achievements.
Step 1: Go to Product Catalog
Navigate to Product > Product Catalog in the left sidebar. This is where you manage all your products and their pricing. You’ll see a list of existing products, or an empty list if you’re starting fresh.Step 2: Add a Product
Click the ”+ Create” button to create a new product. A modal will open where you define what you’re selling.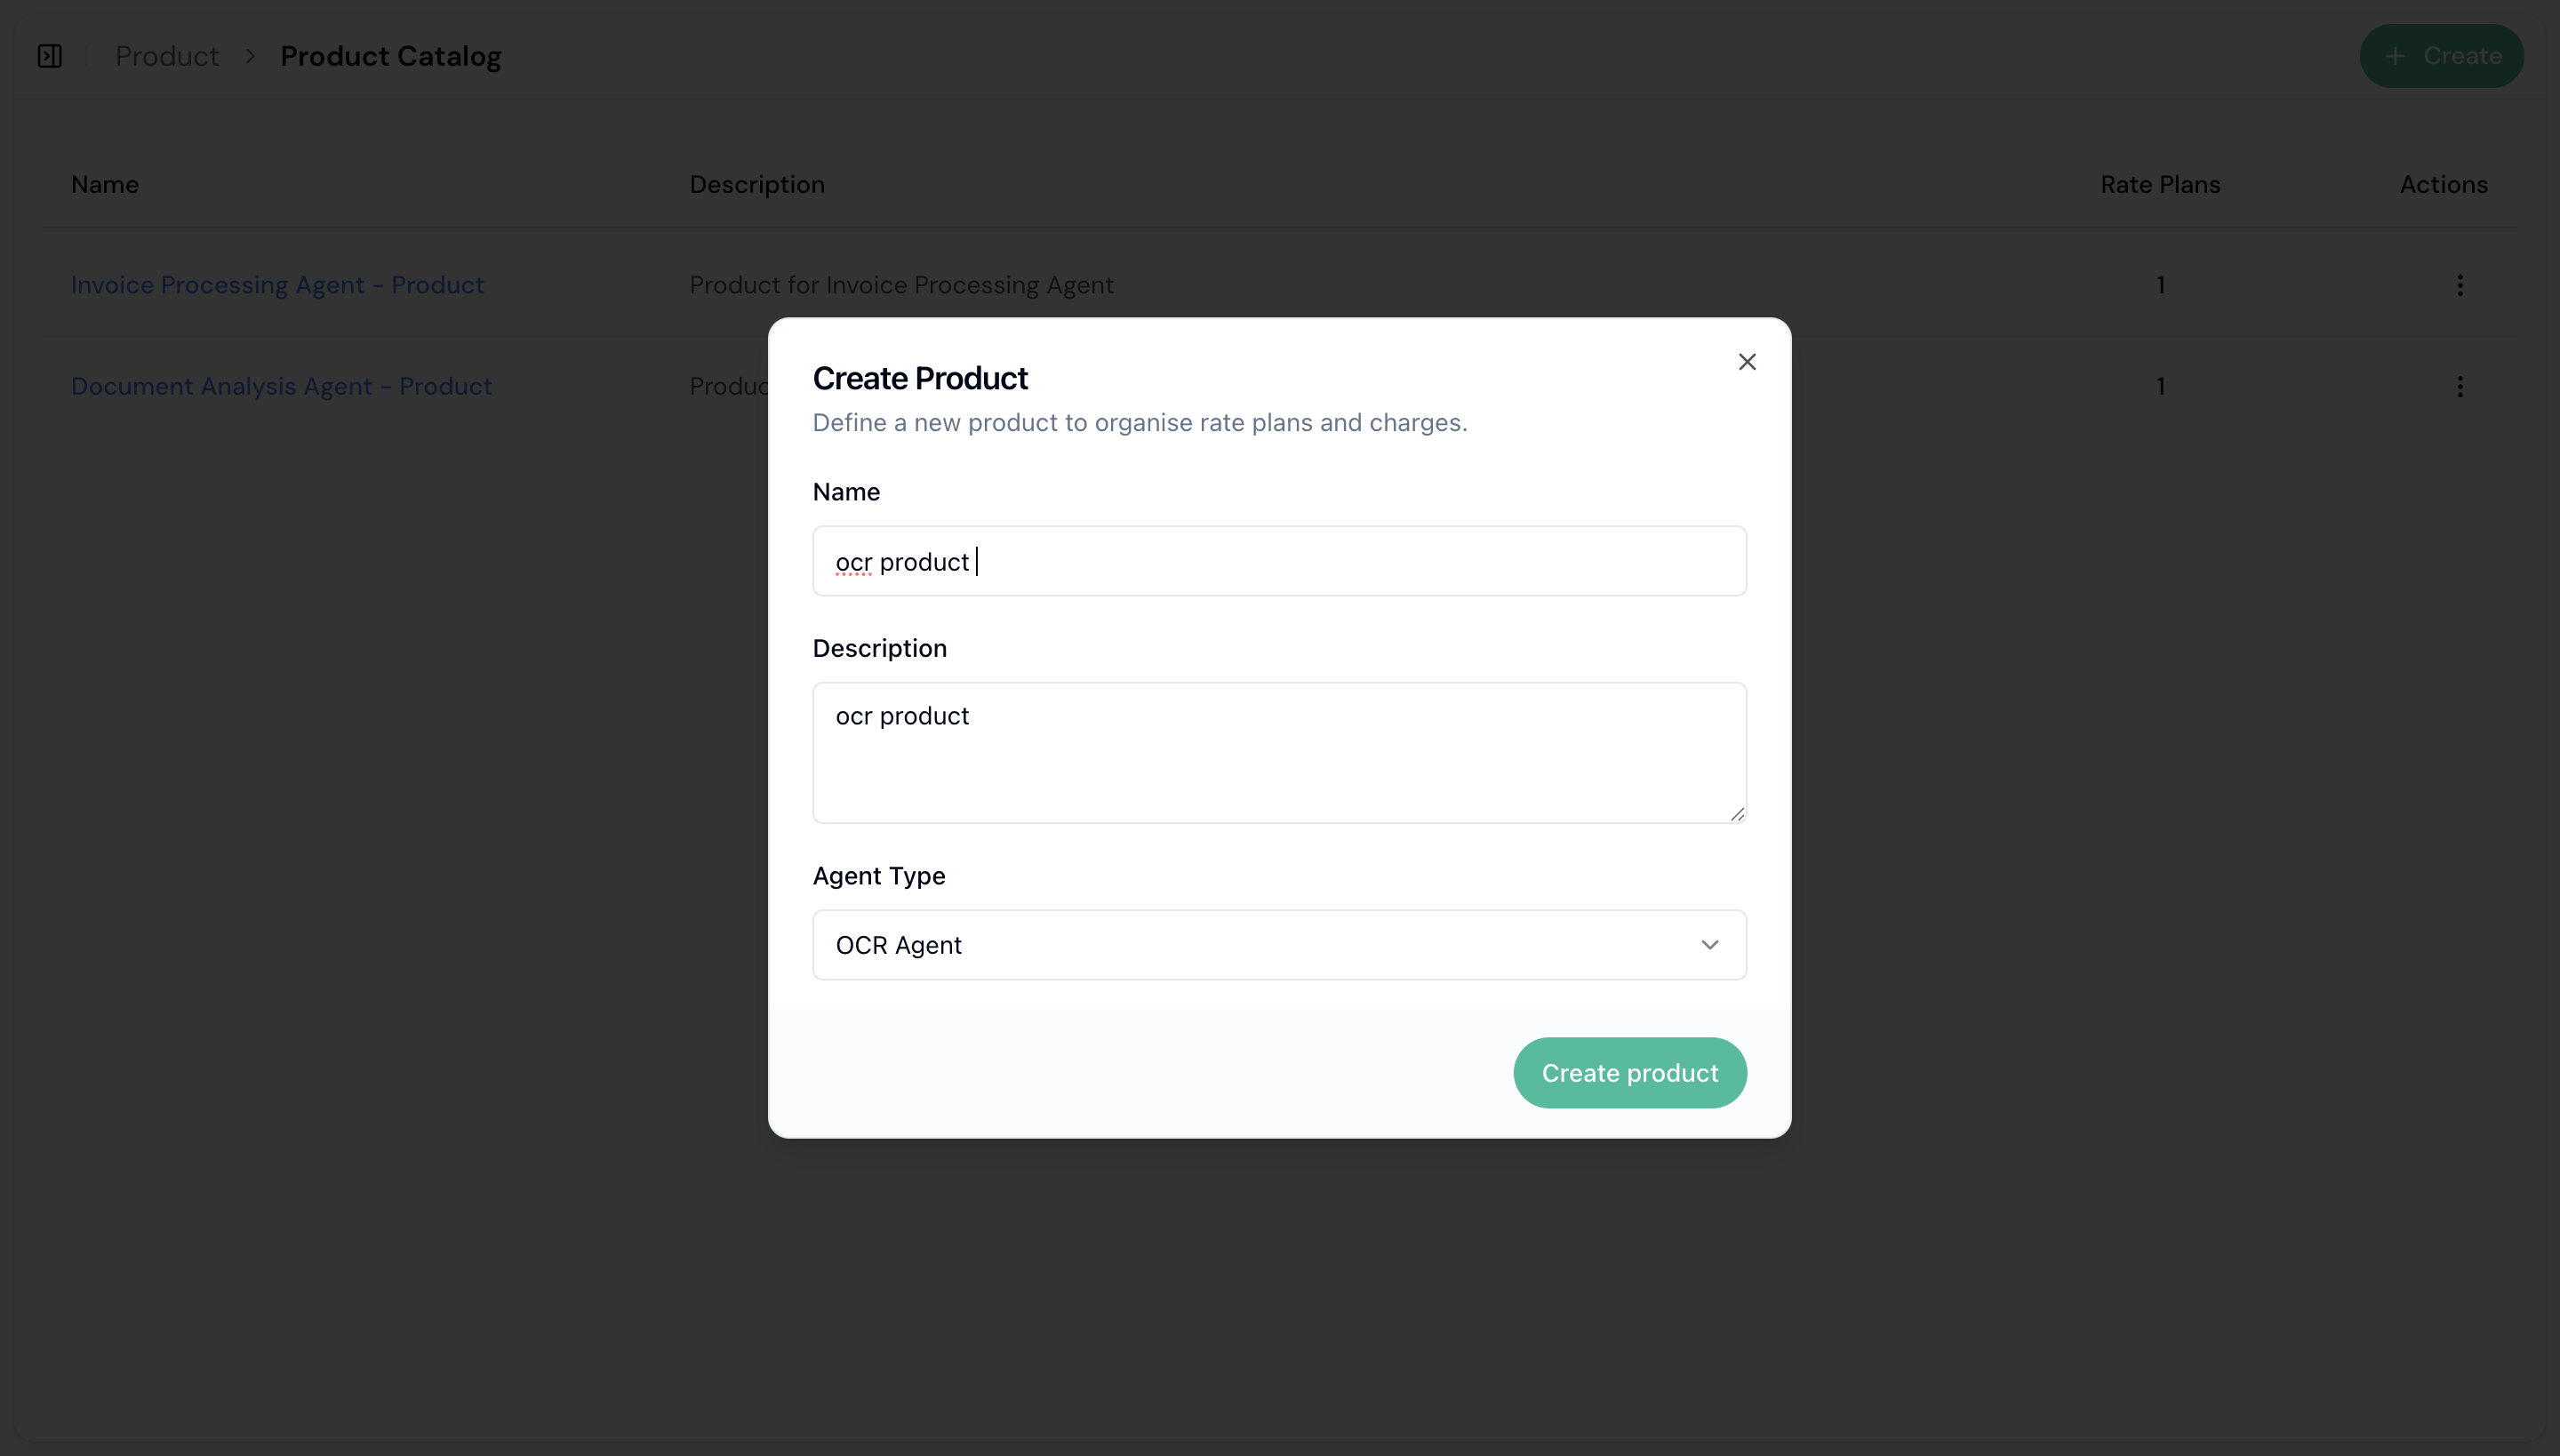
agent type this product is associated with. This connects the product to your agent type so the platform knows which agents this pricing applies to.
Click “Create product” when you’re done. The product is now created and ready for rate plans.
Step 3: Add a Rate Plan
Open your product to see its details page. You’ll see a section for rate plans. Click “New rate plan” to create one.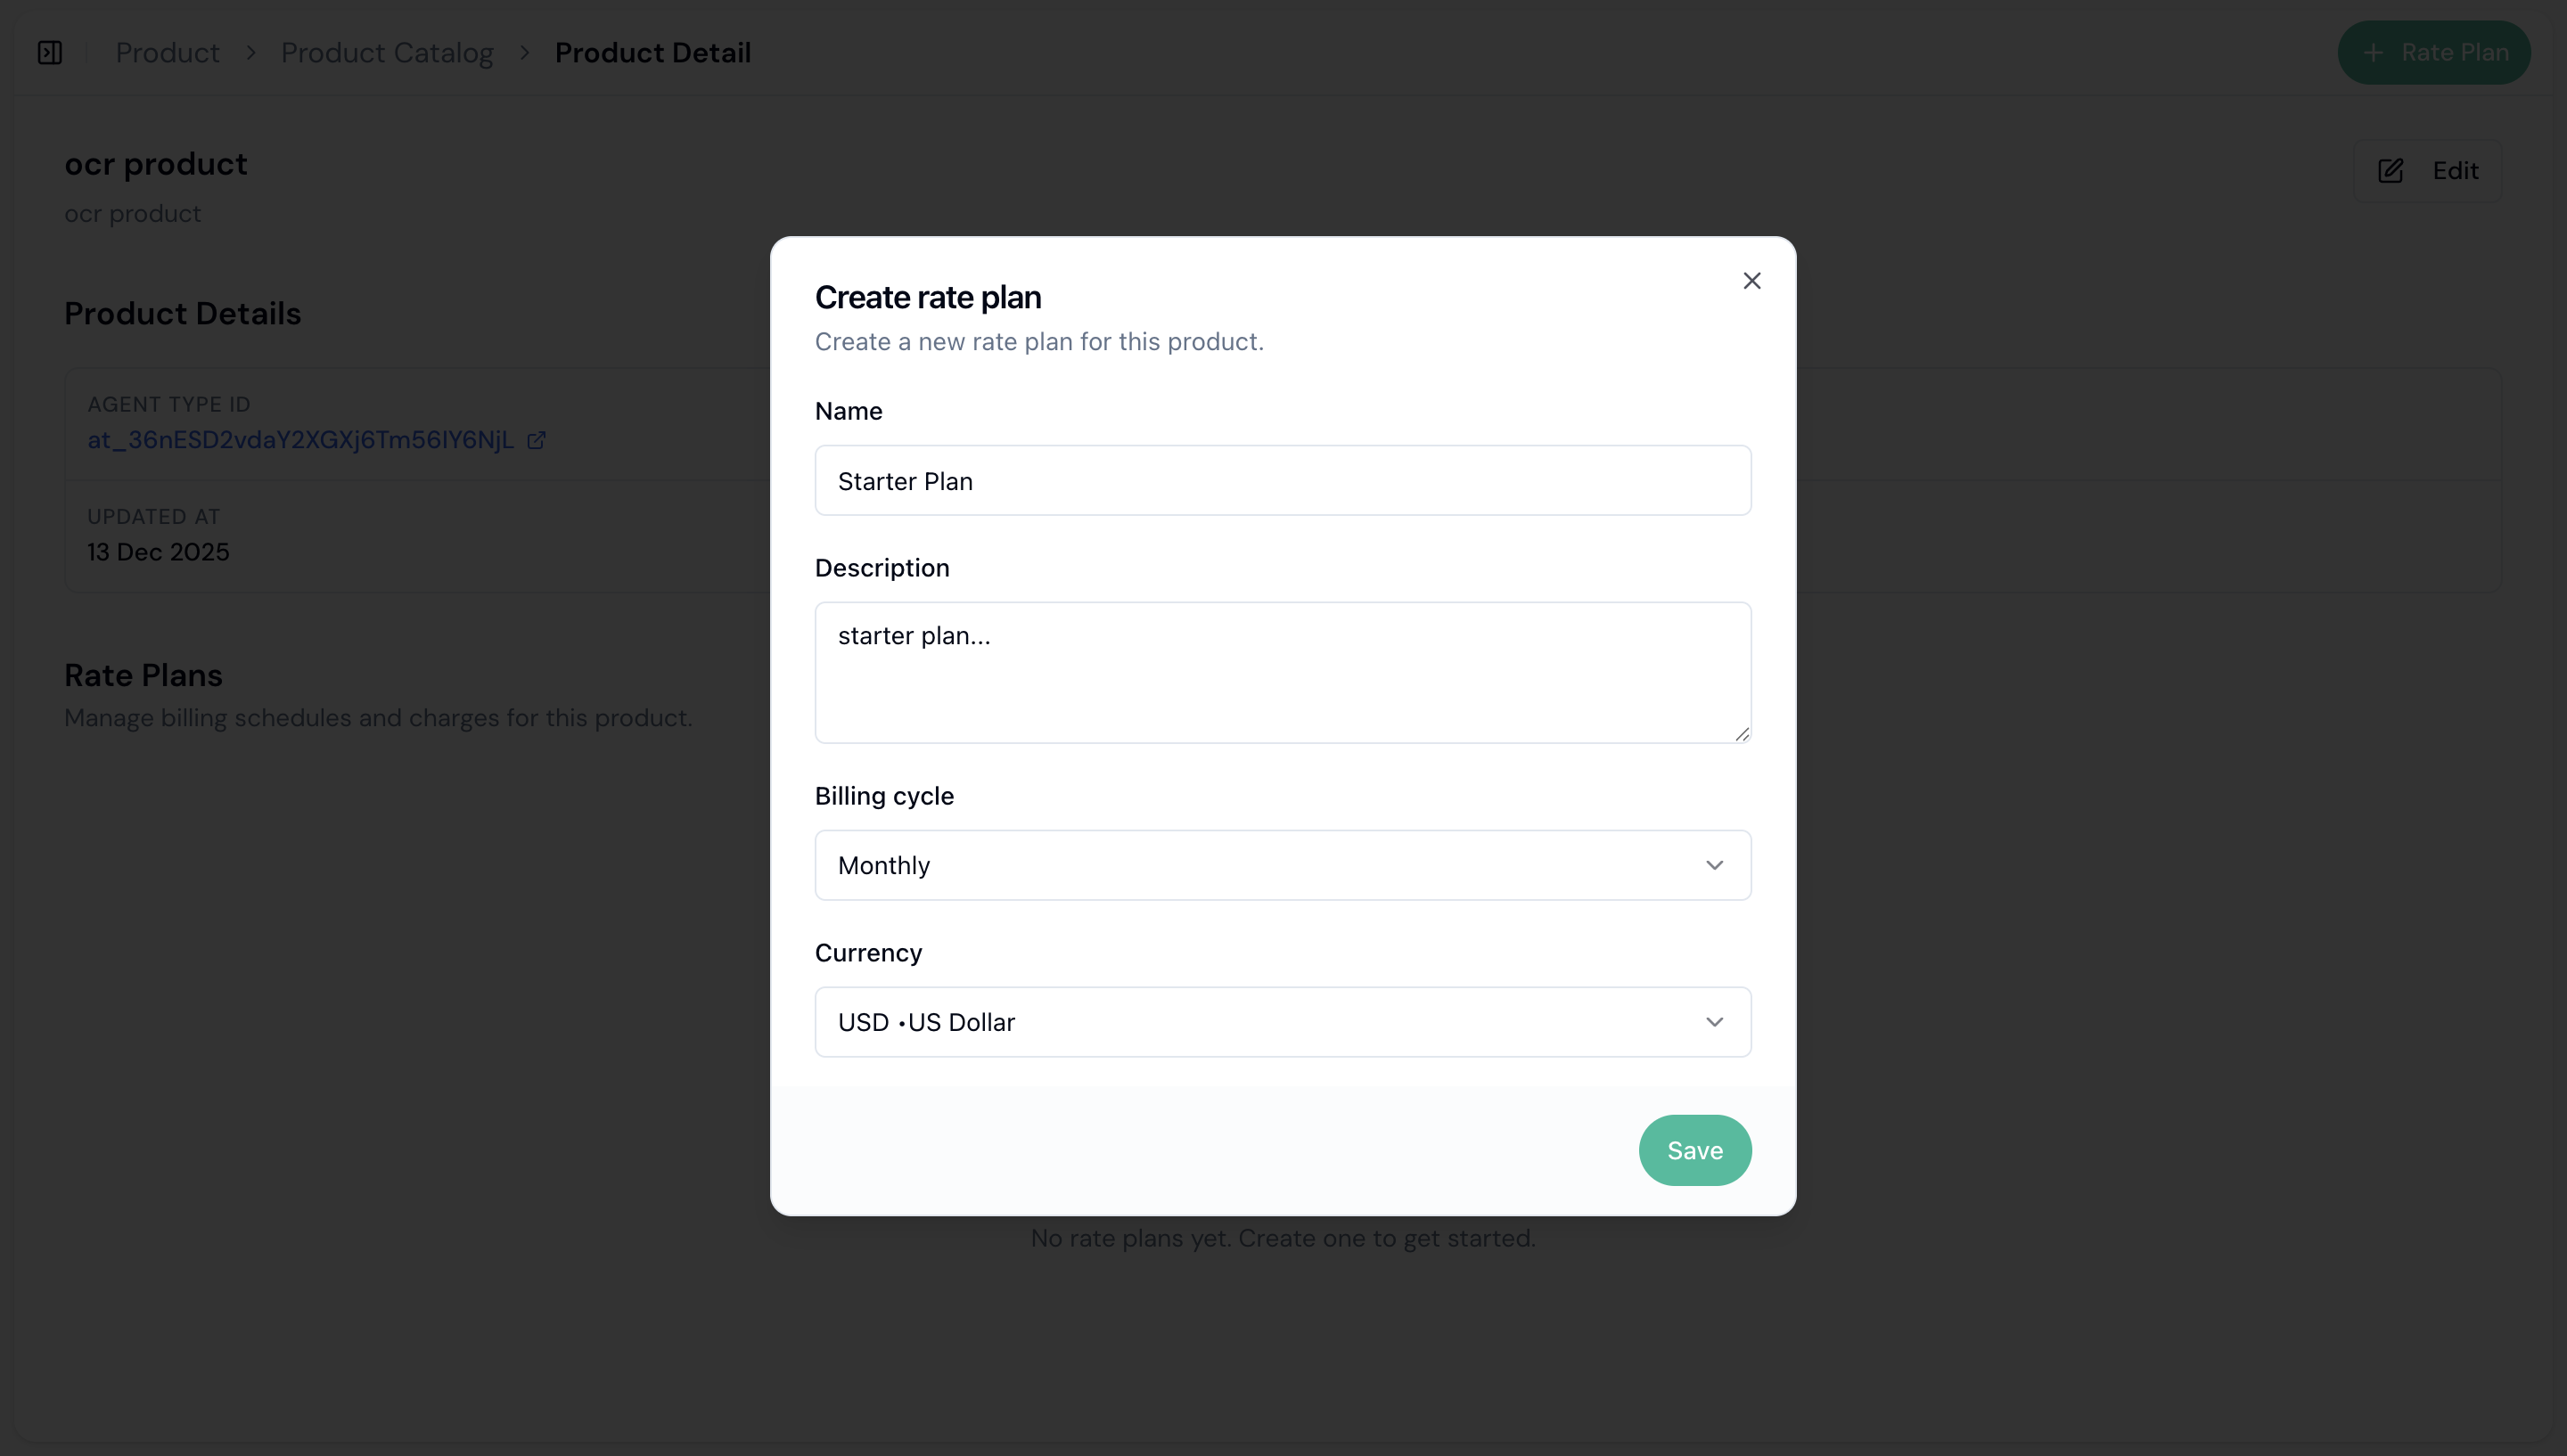
Step 4: Add Charges
Once your rate plan is created, it will show up as a row under your product’s details. To add charges, click on this rate plan to open its detail page, then click ”+ Add charge” to begin setting up a new charge within the rate plan.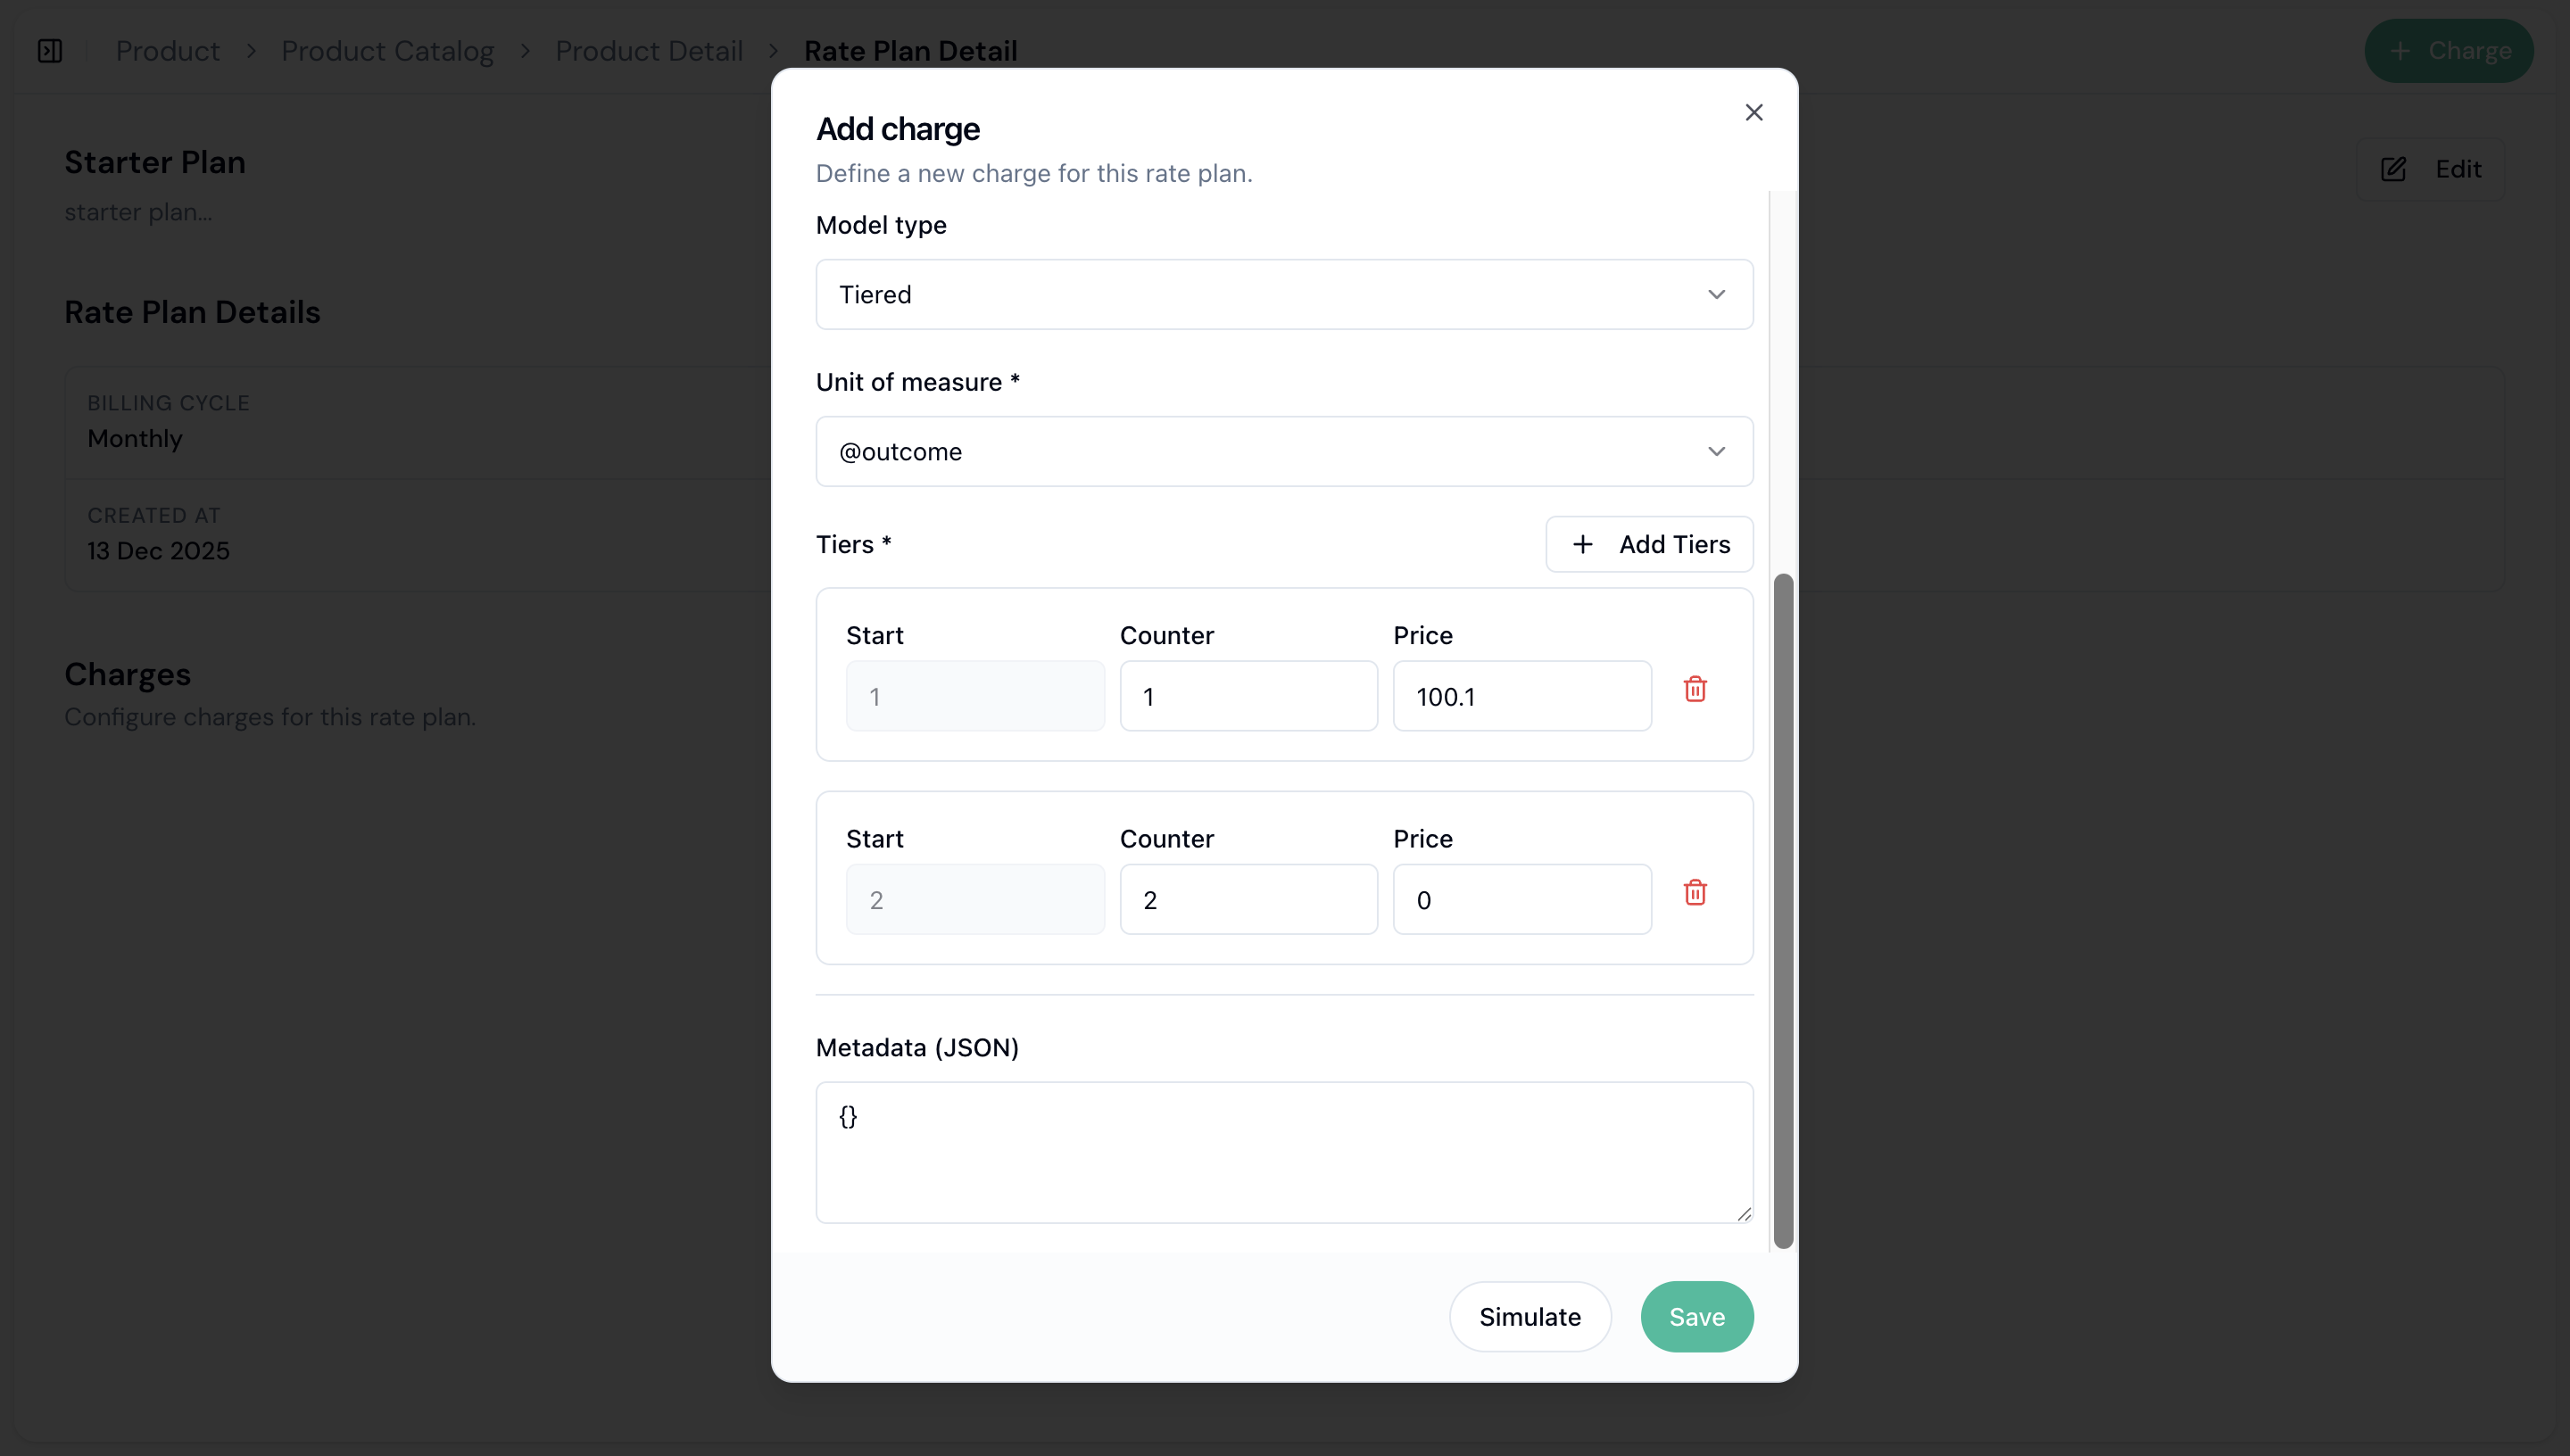
@outcome. This tells the platform to charge based on outcomes achieved, not just actions performed.
If you selected tiered pricing, configure your tiers. Each tier has a start value, an end value, and a price per unit. For example, the first 100 outcomes might cost $50 each, the next 400 cost $40 each, and anything above that costs $30 each.
Before saving, you can click “Simulate” to see how the charge would work with sample usage data. This helps you verify your pricing is correct. When you’re ready, click “Save” to add the charge.
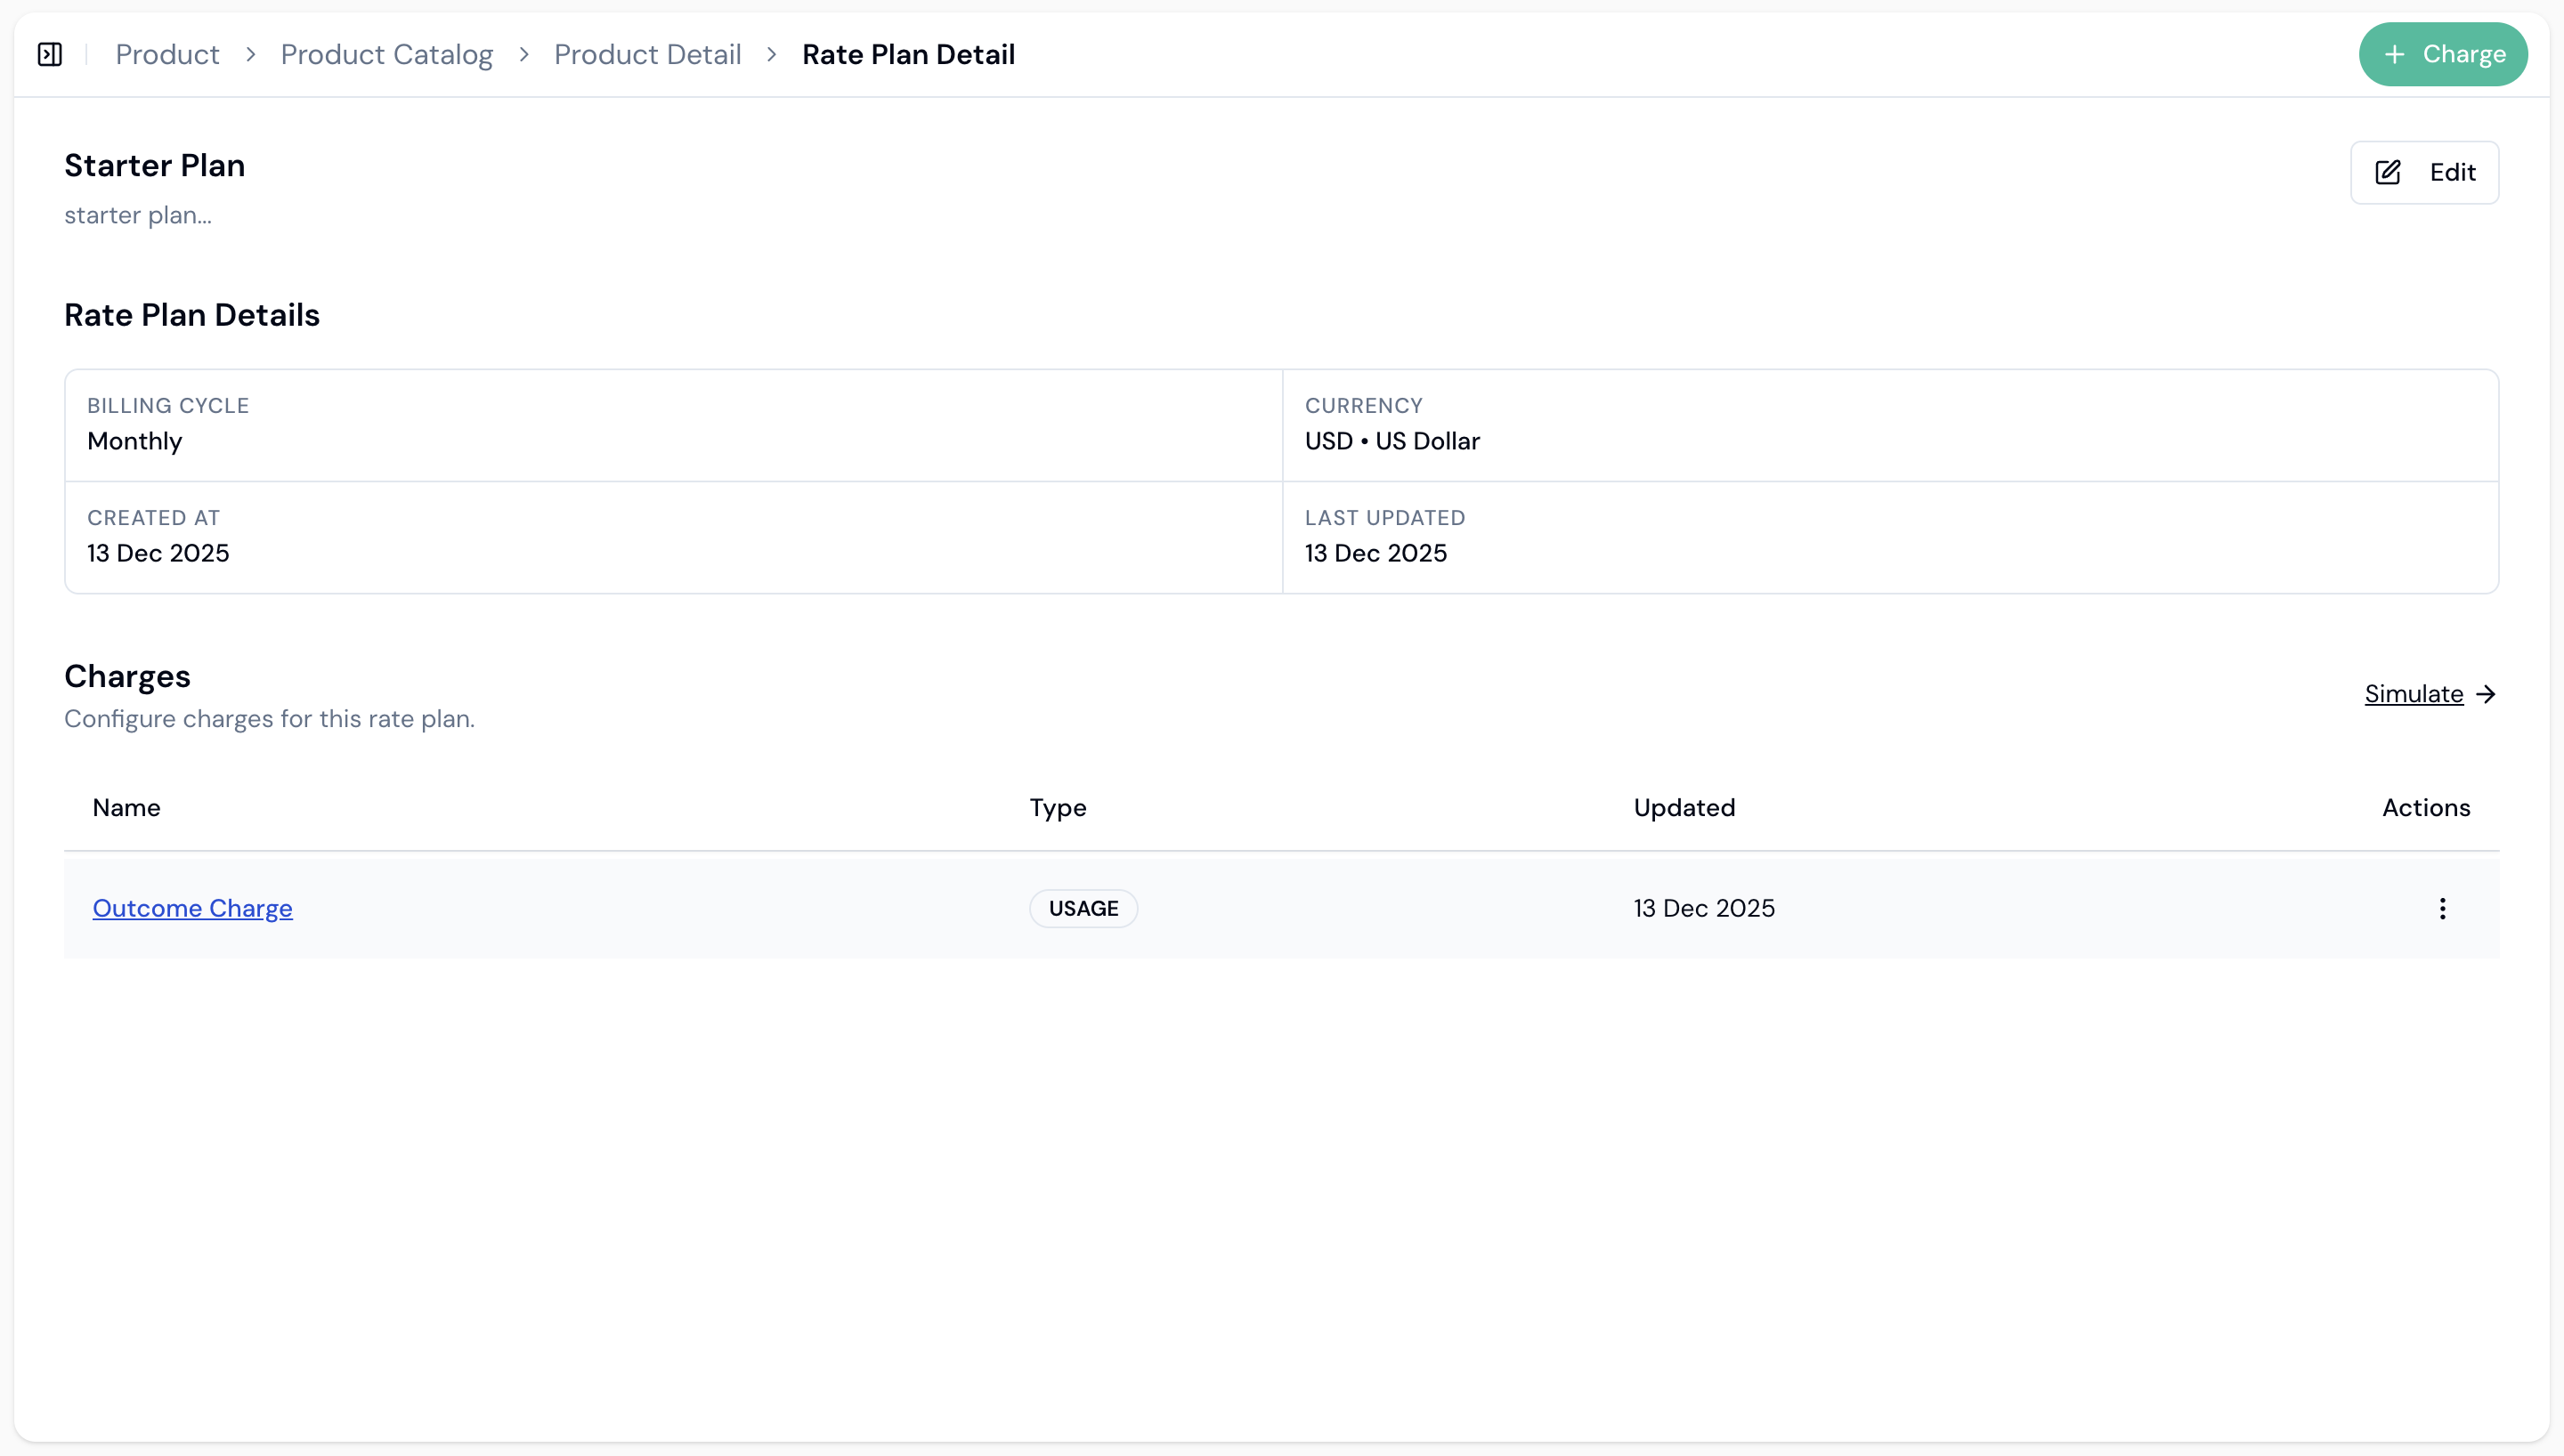
@outcome they achieve. When customers use your agent and achieve outcomes, they’ll be charged according to the pricing tiers you’ve set up.