Introduction
Firebase Cloud Messaging (FCM) is the core service in Firebase that enables sending push notifications to Android devices. It provides a reliable and scalable infrastructure for delivering messages to targeted users or devices. FCM supports various messaging types, including notification messages and data messages.
Prerequisite To create a sync in valmi.io, it is essential to integrate Firebase into your Android app beforehand.
Creating Service Account Credentials
- Go to the Firebase console and select your project.
- Click on the gear icon located in the top-left corner and navigate to
Project settings.- In the
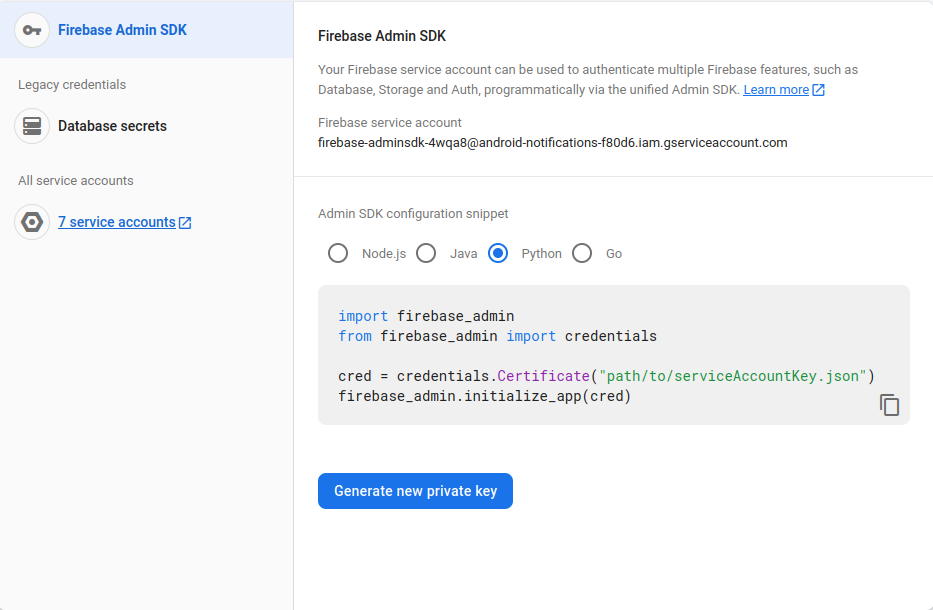
Service Accountstab, scroll down to find the section titled “Firebase Admin SDK” and click on theGenerate New Private Keybutton.- A dialog box will appear with a warning about the sensitivity of the generated private key. Read the information carefully and click on the
Generate Keybutton.- The private key file will be downloaded automatically. It is a JSON file containing your Service Account credentials.
Creating Firebase Connection on valmi.io
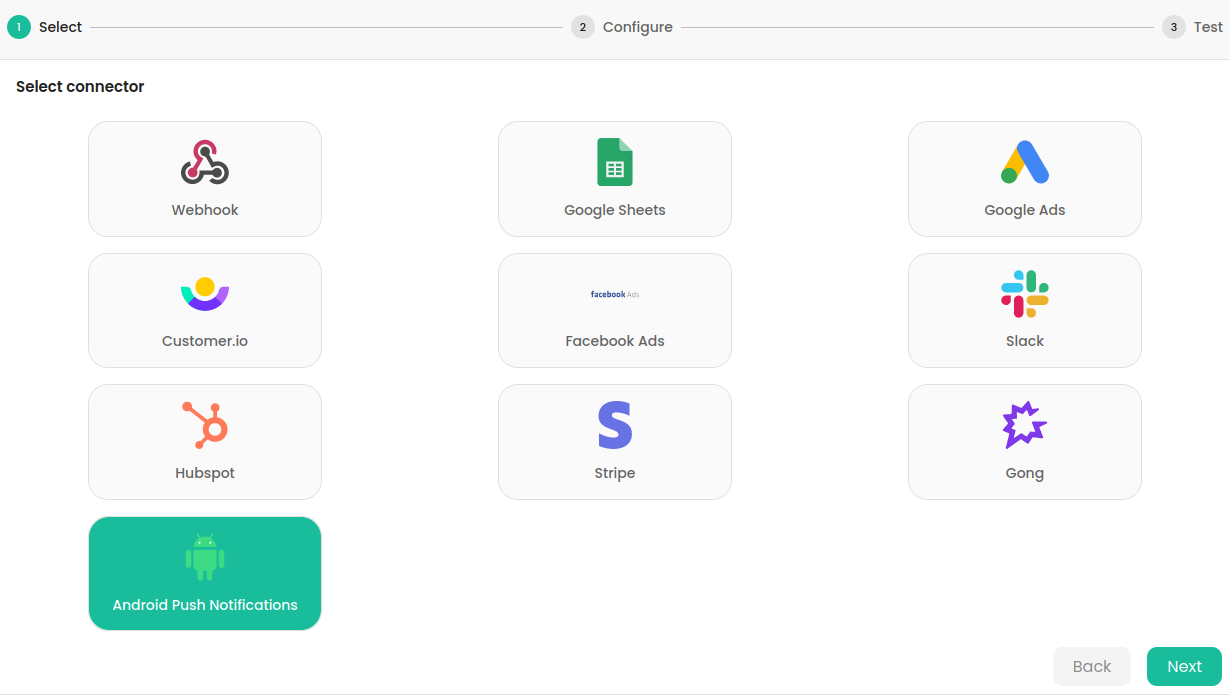
- Go to
destinationsonvalmi.ioand click on+DESTINATIONto create a new destination. SelectAndroid Push Notificationsas the destination.
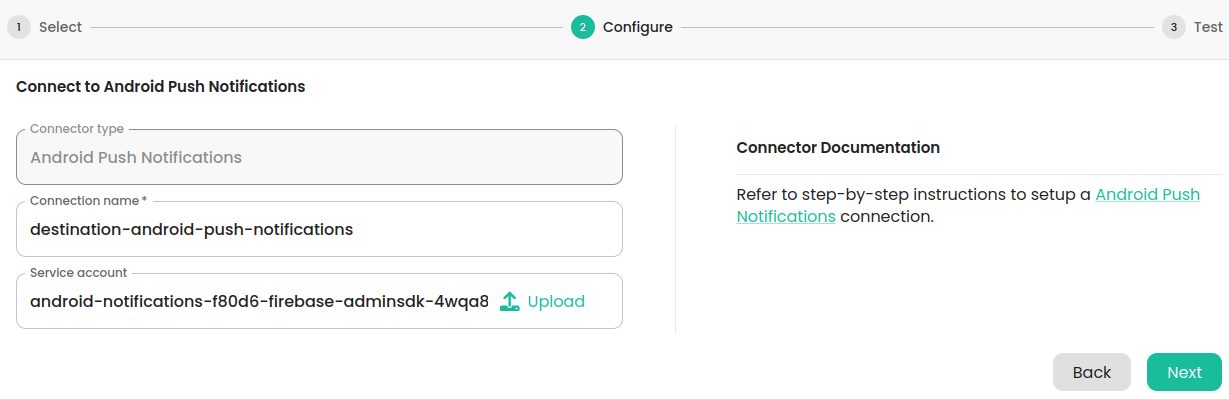
- Provide the desired
Connection Nameand uploaded theFirebase Service Accountdetails file from the Firebase console.
- Click on
Nextto create the destination. If the connection details are valid, the destination will be created successfully.
Setting up the sync
Supported Sync Modes
Android Push Notifications supports the following destination sync modes. Please refer to the Destination Sync Modes for more information on the different destination modes.
| Destination Mode | Supported |
|---|---|
| Append | ✅ |
1. Creation
Go to thesyncs section in valmi.io and click on the +SYNC button to initiate the creation of a new sync.
2. Warehouse and Destination Selection
- Choose the desired data source for your sync. This could be any of the supported sources.
- Select “Android Push Notifications” as the destination for your sync. And proceed to the
mappingpage.
3. Mapping Source Columns to Destination Fields
- On the
Mappingpage, map the source columns to the destination fields. The following table lists the supported destination fields. these fields can be used to createtemplatedpush notifications.
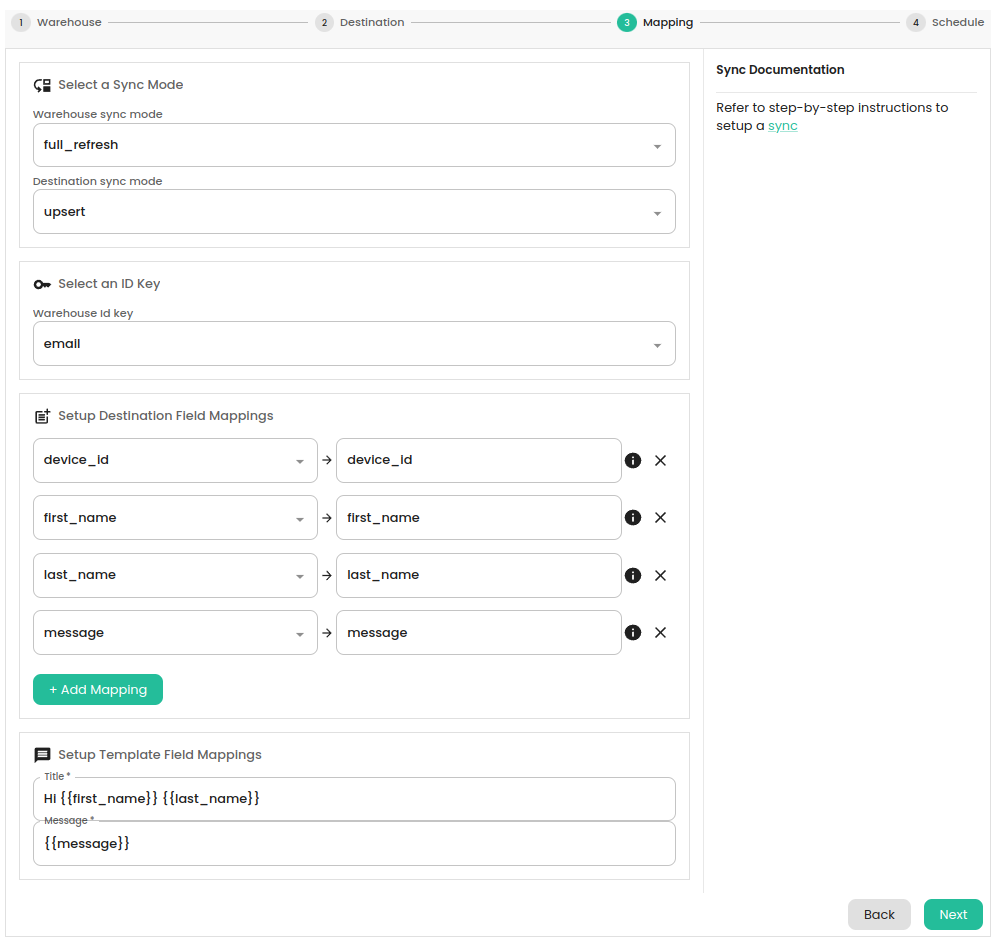
- Click on the
Nextbutton. Provide anamefor your sync andscheduleit to run at the desired frequency.
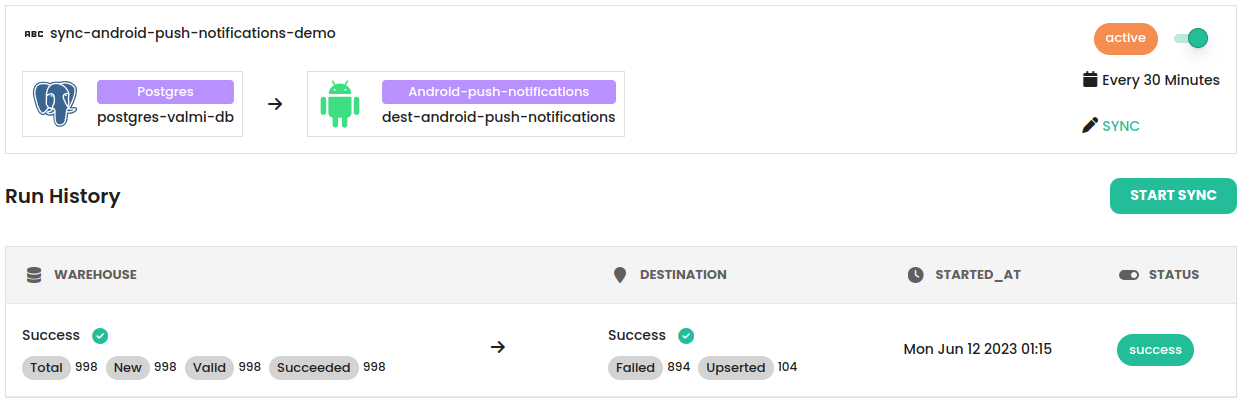
4. Verifying the Sync run
- On the
syncpage
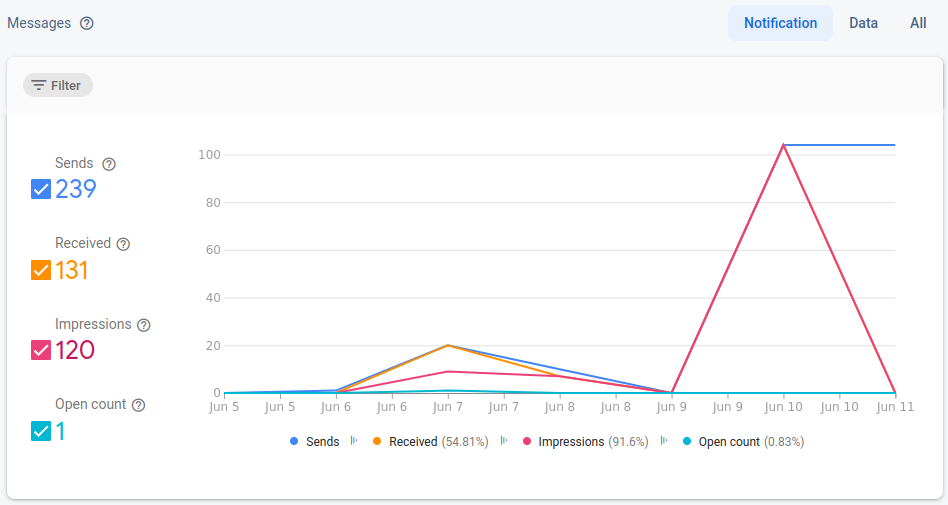
- On Firebase Console, navigate to
Cloud Messagingand click onView FCM reporting dashboardto view the push notification statistics.
- On the mobile device ( Demo App ), App should receive the push notification.